Audio Tags |
Last Updated: 22/03/2019
This topic contains the following sections:
- The Audio Tags feature provides a way to work with distinct voice streams in your scene.
- These tags can be added to, or removed from, any user at runtime, allowing them to communicate with others that have the same audio tags assigned.
- Communication with others is broken down into speaking and listening layers (or channels), giving you fine grained control over how users can speak and listen to each other.
How They Work
- Audio Tags are defined as ScriptableObjects in the Unity Editor.
- They are automatically added to your scene's meta data at compile time and uploaded to the Immerse Platform as part of your build.
- At runtime the Unity SDK exchanges messages with the Immerse Platform's voice services to update and modify the audio tags assigned to each user in the session, thereby changing who they can speak or listen to.
Adding Audio Tags To Your Scene
-
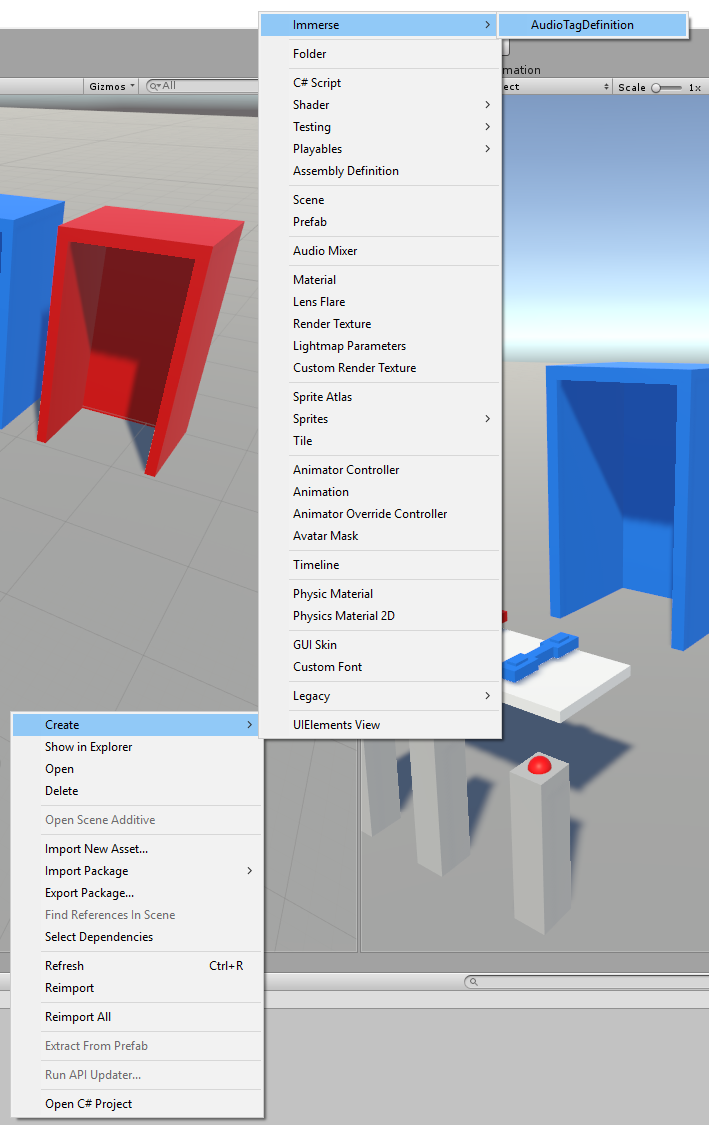
Create one or more AudioTagDefinition assets by using the right-click context menu in the Unity Editor Project view.

- For each tag asset you create, a valid name is required, but the description field is optional. The name is what you call the asset in the Project View. It is also it's filename.
- Audio tag names should adhere to the following guidelines: they must be unique, the can only contain alpha numeric characters and underscores, they must start with a letter.
Note: The audio tags you have defined in your project will be automatically added to your scene's metadata when you build and upload the scene to the Immerse Platform. they can be saved anywhere in your project's Assets folder.
The SDK comes with a default Global audio tag. This will always be the default tag that everybody has when they join a scene. This tag is located here: Assets/ImmerseSDK/Assets/Resources/ImmerseSDK/AudioTags
Changing Tags At Runtime Using Reaction Components
- The SDK contains a number of ready made ImmerseSDK.Audio.Reactions components, that provide an easy way to change the local user's audio tags when something happens in the scene.
- The AreaAudioTagReaction component lets you define an area in your scene using one or more trigger colliders. When local avatars enter or exit this area, the reaction will update their audio tag configuration using the settings you specified on the reaction component.
- The OnEngagedAudioTagReaction component lets you specify audio tag settings to be applied to a local user whenever they grab or release an EngageableObject.
- The OnPushButtonAudioTagReaction component lets you specify audio tag settings to be applied to a local user whenever they press or release a PushButton.
Changing Tags At Runtime Using The Service API
- You can modify the audio tag configuration of the local user by using the AudioTagsService API at runtime.
- You can call the UpdateAudioTags method to change the tags assigned to the local user.
- The method provides a number of overloads that can accept one or more AudioTagsChannelSettings objects, an AudioTagMode, and one or more AudioTagChannel flags.
Note: The AudioTagsService also provides a number of helper methods for determining whether two users can currently communicate with each other.
Examples
The SDK ships with an example scene that shows how to setup audio tags.
See the Assets/ImmerseSDK/Examples/ExampleAudioTags.unity scene in the ImmerseSDK package.
The scene provides working examples using each of the ready made ImmerseSDK.Audio.Reactions components, in addition to a custom inspector menu that demonstrates how to access and call the AudioTagsService API.
Support
As always, if you have any questions or feedback, please don't hesitate to contact us at Email support